Your Path to a Brighter Smile at Home
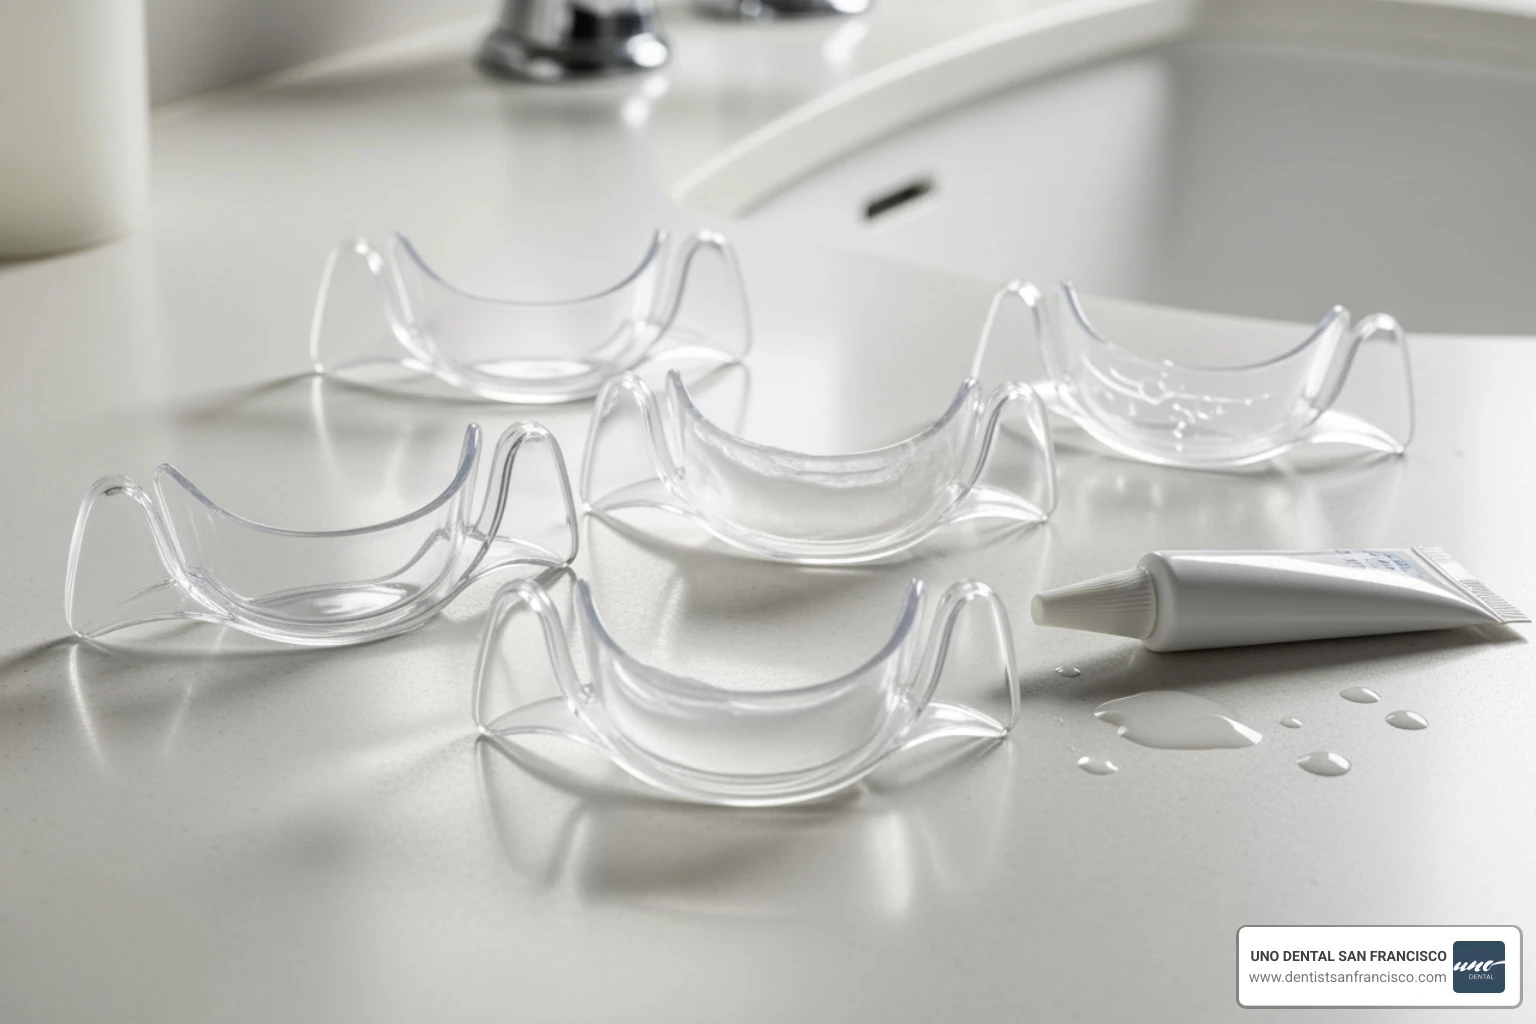
DIY teeth whitening trays are custom-moldable devices that hold whitening gel against your teeth to break down stains and reveal a whiter smile. Here's a quick overview:
How DIY Teeth Whitening Trays Work:
- Mold the tray - Soften a boil-and-bite tray in hot water and press it to your teeth for a custom fit.
- Apply gel - Place a small drop of whitening gel (containing carbamide peroxide or hydrogen peroxide) in each tooth compartment.
- Wear and wait - Keep trays in for 15-60 minutes, allowing the gel to break down stain molecules.
- Repeat daily - Continue for 7-14 days for noticeable results.
Expected Results: A visibly whiter smile in as little as two weeks, at a fraction of the cost of professional treatments ($10-$85 vs. $300-$600).
For many in San Francisco, the convenience and cost-effectiveness of DIY teeth whitening are very attractive. The process uses thermoforming trays to create a custom fit at home. However, achieving that fit requires careful attention to detail. Without following instructions, the material can be easily ruined—a common frustration for first-time users. The good news? With the right guidance, you can achieve great results at home.
I'm Dr. Mohammad Aghiad Kandar of UNO DENTAL SAN FRANCISCO. With over 15 years of experience, I've guided many patients through their whitening options. This guide draws on that experience to help you safely and effectively use diy teeth whitening trays at home, from molding the trays to maintaining your new smile.
 and typical cost comparison: DIY trays $10-85 vs Professional treatment $300-600 - diy teeth whitening trays infographic step-infographic-4-steps")
Reviewed and approved for accuracy by Dr. Mohammad Aghiad Kandar, DDS — UNO DENTAL SAN FRANCISCO.
DIY vs. Professional: A Cost and Benefit Breakdown
When considering how to brighten your smile, the first question is often whether to go the DIY route or invest in professional treatment. Both can lead to whiter teeth, but they take different paths. Understanding these differences helps you make the right choice for you.
| Feature | DIY Whitening Trays | Professional Treatments |
|---|---|---|
| Cost | $10-$85 | $300-$600 |
| Convenience | At-home, on your schedule | Requires dental appointments |
| Whitening Strength | Lower concentration (10-22%) | Higher concentration (up to 35%+) |
| Customization | Boil-and-bite or at-home impressions | Precise dental impressions |
The Benefits of DIY Whitening Trays
The biggest draw of diy teeth whitening trays is the price. While professional trays from a dentist cost between $300 and $600, over-the-counter kits can be found for under $100. This affordability makes them an accessible first step for many.
DIY trays also offer incredible convenience. You can whiten your teeth while watching TV or getting ready in the morning, with no need to schedule appointments. You also have control over the process, allowing you to whiten at your own pace and take breaks if you experience sensitivity. Finally, these kits are widely available online and in drugstores, so you can start your whitening journey almost immediately.
The Advantages of Professional Treatment
While DIY options are appealing, professional whitening treatments offer significant advantages, especially when guided by our experienced team at UNO DENTAL SAN FRANCISCO.
Professionals use stronger whitening agents with higher concentrations of peroxide than over-the-counter products. This allows them to tackle tougher stains and deliver faster, more dramatic results. In-office whitening can brighten your smile several shades in a single visit.
Most importantly, professional treatment involves custom-fit trays created from precise dental impressions. At UNO DENTAL, we take exact molds of your teeth to create trays that fit perfectly. This ensures the gel makes even contact with every tooth while keeping it away from your gums, leading to better results and less irritation.
Finally, professional whitening includes expert supervision. We perform an initial exam to ensure whitening is safe for you, addressing issues like cavities or gum disease first. This oversight minimizes risks and ensures you receive the safest, most effective treatment possible. For those with dental work, sensitivity, or a desire for the fastest results, professional treatment is often the best investment.
Your Step-by-Step Guide to Using DIY Teeth Whitening Trays
Success with diy teeth whitening trays comes down to two key parts: molding the trays correctly and applying the gel properly. Follow these steps carefully for the best results.

How to Properly Mold Boil-and-Bite Trays
The boil-and-bite method is common for at-home trays, but timing is everything. Here’s how to get it right the first time.
- Prepare: Have a bowl of hot (recently boiled) water and a bowl of cool water ready.
- Soften: Holding the tab, submerge the tray in the hot water for just 3-5 seconds. This short time is critical to avoid shrinkage.
- Mold: Quickly place the tray over your teeth. Bite down firmly, then use suction and your fingers to press the tray tightly against your teeth for about 15 seconds.
- Set & Trim: Remove the tray and place it in the cool water to set the shape. Once hardened, use scissors to carefully trim any excess material that extends onto your gums.
Many people find this step tricky on the first try. The good news is that most trays can be re-molded if you don't get a perfect fit.
Applying Whitening Gel and Using Your DIY Teeth Whitening Trays
Once your trays fit well, it's time for the gel. How you apply it is just as important as the fit.

First, brush and floss thoroughly to remove any plaque. For the best results, dry your teeth before inserting the trays. When applying the gel, less is more. Place a small drop in each tooth compartment—just enough to cover the front surface. Overfilling wastes gel and can cause it to ooze onto your gums, leading to irritation. If any gel escapes, wipe it away immediately with a tissue.
Wear time depends on the gel's concentration. A higher-strength gel might require only 20-30 minutes, while lower concentrations can be worn for 45-60 minutes. Always follow the specific instructions included with your gel.
For optimal results, use the trays once daily for 7-14 consecutive days. After each session, brush your teeth to remove residual gel and clean the trays with cool water and a toothbrush. Store your trays in a cool, dry place and keep the gel refrigerated to maintain its potency.
Choosing Your Tools: Trays and Gels
The effectiveness of diy teeth whitening trays depends on two components: the trays and the whitening gel. Understanding your options helps you make the best choice for your smile.
What are the different types of DIY teeth whitening trays?
When shopping for at-home whitening, you'll generally find three types of trays:
- Boil-and-Bite Trays: These are the most common and affordable option. Made from a thermoplastic material, you soften them in hot water and mold them to your teeth at home. The fit is semi-custom and depends on how carefully you perform the molding process.
- At-Home Impression Kits: This option provides a more precise, lab-quality fit. You receive a kit to take your own dental impressions, which you then mail to a lab. The lab uses your molds to fabricate trays that are custom-fit to your teeth, similar to what you'd receive at a dental office. This reduces gel leakage and improves comfort.
- Pre-filled Trays: These are the most convenient choice. They are single-use, disposable trays that come pre-loaded with whitening gel. While easy to use, they are typically one-size-fits-all and lack the custom fit of other options.
Some trays feature small indentations or "reservoirs" to hold gel, but research suggests they aren't necessary for effective whitening. A snug fit that keeps the gel in contact with your teeth is what truly matters.
How to Choose the Right Whitening Gel
The gel contains the active ingredients that whiten your teeth. Here’s what to look for:
- Active Ingredients: The two main agents are carbamide peroxide and hydrogen peroxide. Carbamide peroxide breaks down more slowly, making it gentler and often preferred for at-home use, especially for those with sensitivity. Hydrogen peroxide works faster and is more potent, which is why it's often used for in-office treatments.
- Concentration Strength: Gels come in various strengths. Lower concentrations (e.g., 10-16% carbamide peroxide) are ideal for beginners or those with sensitive teeth, requiring longer wear times. Higher concentrations (e.g., 22-35%) deliver faster results but require shorter wear times and have a greater risk of causing sensitivity. If you're unsure, starting with a lower concentration is always a wise choice.
- Gel vs. Foam: Some kits offer whitening foams instead of gels. Foam can be gentler and may penetrate small spaces between teeth more easily.
The beauty of DIY whitening is the ability to customize your approach. You can start with a lower concentration and adjust based on your comfort and results. If you need help choosing, our team at UNO DENTAL SAN FRANCISCO is available for guidance.
Safety First: Mitigating Risks and Side Effects
While diy teeth whitening trays are a convenient way to brighten your smile, prioritizing safety is essential for a healthy and positive experience.

Common Side Effects and How to Manage Them
The most common side effects are tooth sensitivity and gum irritation, both of which are usually temporary and manageable.
-
Managing Tooth Sensitivity: Sensitivity occurs when the gel temporarily opens pores in your teeth. It's a common reaction that typically subsides. To manage it:
- Use a desensitizing toothpaste before and after treatment.
- Reduce your wear time (e.g., 15 minutes instead of 30).
- Take a day or two off between whitening sessions to let your teeth recover.
- If sensitivity is severe or persists, stop treatment and consult your dentist.
-
Preventing Gum Irritation: Irritation or a temporary burning sensation happens when the gel contacts your gums, often from an ill-fitting tray or overfilling.
- Use only a small drop of gel per tooth.
- Wipe away any excess gel from your gums immediately after inserting the tray.
- Ensure your tray is well-molded and trimmed to avoid contact with gum tissue.
Whitening gels typically do not harm enamel, fillings, or bonding materials. However, they will not whiten existing dental work, which can create a color mismatch.
Important Warnings for Your DIY Teeth Whitening Trays
To protect your oral health, always heed these crucial warnings:
- Follow Instructions: Always read and follow the specific directions for your kit regarding molding, application, and wear time. Deviating can lead to poor results or increased side effects.
- Check Expiration Dates: Do not use expired whitening gel, as it may be ineffective or cause adverse reactions.
- Avoid Contact with Eyes: If gel gets in your eyes, rinse thoroughly with water.
- Keep Away from Children: Whitening products are for adult use only and should be stored safely.
- Who Should Avoid Whitening: Whitening is not recommended for pregnant or lactating women. If you have conditions like severe sensitivity, gum recession, cracked teeth, or active cavities, consult your dentist first. A dental professional at UNO DENTAL SAN FRANCISCO can determine if whitening is safe for you.
- Avoid Smoking: Wait at least two hours after treatment before smoking, as tobacco can quickly re-stain your teeth.
Long-Term Success: Maintenance and Professional Guidance
Achieving a brighter smile with diy teeth whitening trays is a great accomplishment, but maintaining those results requires ongoing care and knowing when to seek professional advice.
Maintaining Your Whitening Results
Your daily habits are the biggest factor in how long your whitened smile lasts. To keep your teeth looking their best, follow these tips.
- Avoiding Staining Foods and Drinks: For at least 48 hours after whitening, and as a general habit, try to limit consumption of items known to cause stains. These include:
- Coffee and Tea
- Red Wine
- Dark Berries
- Soy Sauce and Dark Sauces
- Tobacco Products
If you do consume these, rinsing your mouth with water afterward can help minimize staining.
- Practice Excellent Oral Hygiene: Brushing twice a day and flossing daily is fundamental. This removes surface stains and plaque, preventing new discoloration from setting in.
- Care for Your Trays and Gel: Always clean your diy teeth whitening trays with cool water and a soft brush after each use. Store them in a clean, dry case away from heat. To preserve its potency, keep your whitening gel in the refrigerator.
By incorporating these habits, you can significantly extend the life of your bright new smile.
When to Choose Professional Whitening Instead
While DIY trays are effective for many, there are times when professional whitening at UNO DENTAL SAN FRANCISCO is the safer and more effective choice.
- Severe or Intrinsic Stains: If stains are deep, stubborn, or caused by medication or trauma, professional-strength agents are often necessary.
- Persistent Sensitivity: If you experience severe sensitivity with DIY kits, a dentist can offer treatments designed to minimize discomfort.
- Existing Dental Work: Whitening gels won't change the color of crowns, veneers, or bonding. A dentist can create a plan to ensure a uniform, natural-looking smile, which may involve replacing old restorations to match your new shade.
- Desire for Rapid Results: For a special event or the fastest possible change, in-office professional whitening delivers the most dramatic results in a single appointment.
- Underlying Oral Health Issues: If you have gum disease, cavities, or exposed roots, a dental exam is crucial before any whitening. We always prioritize your overall oral health before beginning cosmetic procedures.
Frequently Asked Questions about DIY Whitening Trays
It's natural to have questions when starting a new whitening routine. As dental professionals at UNO DENTAL SAN FRANCISCO, we've compiled answers to some of the most common queries about diy teeth whitening trays.
How long do the results from DIY trays last?
Results can last from several months to over a year, but this depends heavily on your lifestyle. Consuming staining items like coffee, tea, red wine, and tobacco will shorten the lifespan of your results. Many people find that doing a touch-up treatment—whitening for a few consecutive days every three to six months—helps maintain their desired shade.
Can I eat or drink while wearing my whitening trays?
No. You should not eat, drink, or smoke while wearing your diy teeth whitening trays. Doing so interferes with the whitening process, can cause uneven staining, and puts you at risk of swallowing the gel. Chewing can also damage your carefully molded trays. Always remove your trays before consuming anything other than water, and brush your teeth before reinserting them.
How often should I whiten my teeth with DIY trays?
The frequency depends on the gel's concentration. Most initial treatments involve daily use for 7 to 14 days. Wear time is shorter for high-concentration gels (e.g., 15-30 minutes) and longer for lower-concentration ones (e.g., 45+ minutes). Some gentle formulas are even designed for overnight use.
Crucially, you must always follow the specific instructions provided with your kit. Overusing the trays or gel will not speed up results and significantly increases your risk of tooth sensitivity and gum irritation. If you experience sensitivity, take a break for a day or two.
At UNO DENTAL SAN FRANCISCO, we offer free virtual smile consultations to help determine the best approach for your unique situation. Whether you choose the DIY route or opt for professional whitening, we're here to guide you. Explore professional dental whitening trays and expert advice with our team.
A Brighter Smile is Within Reach
We've covered a lot of ground together in this guide, and if you've made it this far, you're well-equipped to start on your journey with diy teeth whitening trays. The path to a brighter smile truly is within reach, and for many of us, these at-home solutions offer an effective and remarkably affordable way to achieve the confidence that comes with a dazzling smile.
The beauty of DIY whitening lies in its accessibility—we can start whenever we're ready, work at our own pace, and achieve gradual, noticeable results from the comfort of home. But as we've discussed throughout this guide, success isn't just about purchasing a kit and hoping for the best. It depends on proper molding of our trays to ensure a snug, comfortable fit, careful gel application to maximize effectiveness while minimizing sensitivity, and consistent maintenance to keep our smile bright for months to come.
That said, we understand that DIY isn't the right choice for everyone, and that's perfectly okay. If we're dealing with severe or intrinsic stains that seem resistant to at-home treatments, if we have existing dental work like crowns or veneers that need to match our newly whitened teeth, or if we're experiencing persistent sensitivity that won't subside, it's time to seek professional guidance. Sometimes, the fastest and safest path to our ideal smile involves expert oversight.
At UNO DENTAL SAN FRANCISCO, we believe in a balanced, holistic approach to oral care. Our team specializes in comprehensive, patient-centered dental services that combine high-tech solutions with individualized attention. We're not here to push one-size-fits-all treatments—instead, we take the time to understand your unique smile journey, your concerns, and your goals. Whether that means supporting your at-home whitening efforts with professional advice or providing custom-fit professional whitening trays with stronger, dentist-supervised treatments, we're here to ensure your experience is safe, effective, and custom specifically to you.
We even offer free virtual smile consultations, making it easier than ever to get expert guidance without leaving your home. Think of us as your partners in achieving and maintaining the smile you've always wanted.
Ready to take the next step? We invite you to explore our professional whitening services and find how our expert team can help you achieve your brightest, most confident smile.
Explore professional dental whitening trays and expert advice